
Contents
To deploy an EventFlow or LiveView fragment at the command prompt with the epadmin command requires the following steps:
- In StreamBase Studio:
-
-
Create a new, separate project in StreamBase Studio of type StreamBase Application.
-
Add a Maven dependency on the fragments you want to include in this StreamBase Application project.
-
Create an application archive file for the StreamBase Application project.
-
- At the command prompt:
-
-
Install a node containing the application archive file, using
epadmin install node. -
Start the node, thereby starting the fragment running, using
epadmin start node.
-
The sections below explain these steps in more detail.
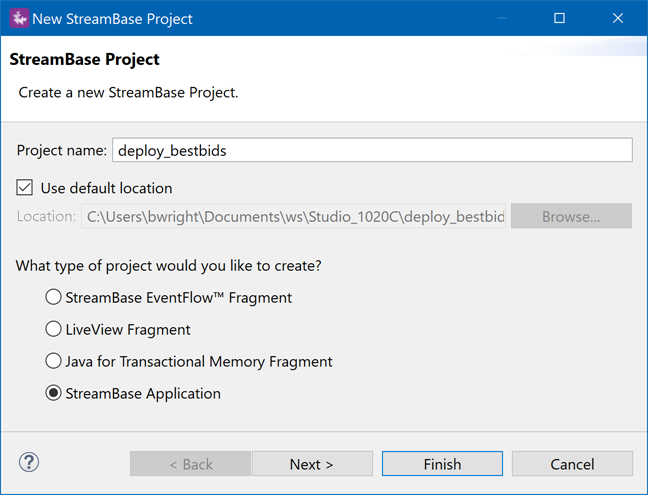
Create a new, separate Studio project to contain the StreamBase Application that will incorporate your fragment archive.
-
In Studio, invoke >>.
-
In the resulting dialog's first panel, enter a name for the project, and select StreamBase Application as the project type. It is a best practice to choose a name for this project that starts with "deploy" to distinguish it from EventFlow fragment projects.
-
Click , then .
-
Optional. At the second panel, click instead of . This opens a third panel named Archetype Properties. To cut down on the number of test instances created, edit the
testnodesline from its default A,B,C to just A. -
Click .
The newly created StreamBase Application project does not yet know about any fragments. You must add a Maven dependency for your new project on the fragment archive created in step 1.
-
Select the name of the StreamBase Application project in the Project Explorer view.
-
Right-click and from the context menu, select >.
-
In the Add Dependency dialog, in the Enter groupid, artifactId field, enter the first few parts of the group ID of the fragment you are adding. Enter enough letters to narrow the list to the projects whose package name begins with those letters.
For StreamBase samples, enter
com.tibco.sb.sampleorcom.exampleto narrow the list to the fragment archives you have created for samples. For your own projects, enter the first portion of your company's group ID.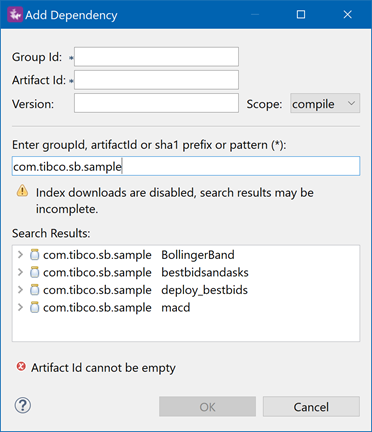
-
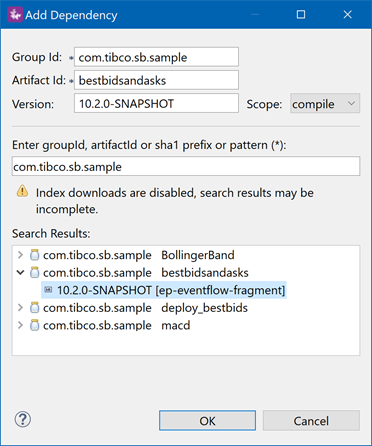
In the Search Results field, select the EventFlow fragment project for which you built a fragment archive in step 1. The following image shows the fragment archive for the Best Bids and Asks sample.
-
Selecting a fragment archive entry fills in the Group Id, Artifact Id, and Version fields of the dialog. Click .
-
The Add Dependency dialog has made changes to the project's
pom.xmlfile. Save those changes by clicking the Save or Save all button, or with Ctrl+S (Windows) or command+S (Mac).
Create a runnable archive file for your StreamBase Application project as follows:
-
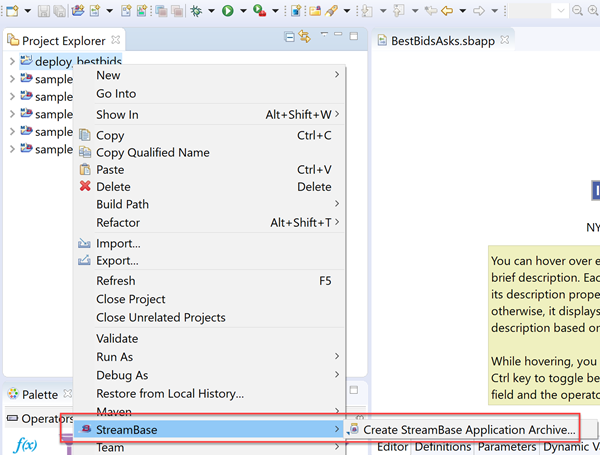
In the Project Explorer view, select the name of your StreamBase Application project.
-
Right-click and from the context menu, select >.
-
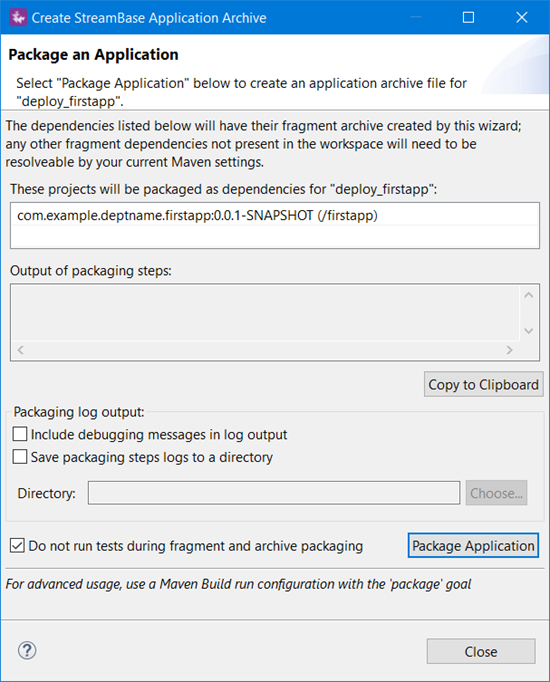
This opens a wizard:
-
Click . The wizard runs for a moment. Its tasks are to:
-
Create fragment archives for the dependent projects.
-
Create an application archive for the application project. The application archive contains the fragment archives.
The process shows a number of logging lines both in the Output field of the wizard and in Studio's Console view. Look for the BUILD SUCCESS message in both places.
-
-
Click to close the wizard.
The wizard creates a file in the
targetfolder of the StreamBase Application project, whose name ends with*ep-application.zip.(You may have to right-click and select Refresh on the
targetfolder.)
Install the newly created application archive zip file into a StreamBase Runtime node as follows:
-
Using a StreamBase Command Prompt on Windows or a configured shell prompt on macOS and Linux, navigate to your Studio workspace folder. For example:
Windows: cd "\Users\sbuser\Documents\StreamBase Studio 10.5 Workspace"
macOS:   cd /Users/sbuser/Documents/StreamBase\ Studio\ 10.5\ Workspace
-
Navigate to the
targetsubfolder of your StreamBase Application project. For example:cd deploy_bestbids/target
Tip
As a shortcut for the above steps, you can select any EventFlow fragment project in Studio's Project Explorer view, right-click, and from the context menu, select > (Windows) or > (Mac). Then navigate up and over to your deployment project.
cd ../deploy_bestbids/target
-
Run a command like the following. This is a single command, shown here on multiple lines for clarity. On macOS:
epadmin install node \
  --application=deploy_bestbids-0.0.1-SNAPSHOT-ep-application.zip \
  --nodename=A.sbuser \
  --nodedirectory=/home/sbuser/tmp/Nodedirs
Remember that you can use shortened parameter names, as long as they are unique within the epadmin target's command set:
epadmin install node \
  --app=deploy_bestbids-0.0.1-SNAPSHOT-ep-application.zip \
  --nodena=A.sbuser \
  --nodedi=/home/sbuser/tmp/Nodedirs
On Windows, you can use forward slashes as shown above, or use Windows-style backslashes and a drive letter:
  ...
  --nodedi=C:\home\sbuser\tmp\Nodedirs
These example commands are shown on four lines for clarity, but must be typed as a single command.
-
You can now run
edadmin display servicesto make sure your node was installed.
Refer to the following pages to understand the parameters you can type on the epadmin install node and epadmin start node command lines:
-
StreamBase Applications for the application= parameter
-
Node names for the nodename= parameter
-
Node directories for the nodedirectory= parameter
Start the installed node with a command like the following. For the servicename= parameter, use the same name you declared as nodename= above.
epadamin servicename=A.sbuser start node
Your EventFlow fragment is now running inside a StreamBase Runtime node and can accept input and return output.