
This page discusses the perspectives provided by StreamBase Studio and discusses how to manage perspectives and views.
In Eclipse, a perspective is a collection of Editor and View windows that are opened together to perform a specific task. A perspective usually has one primary editing window where most tasks are performed, and several peripheral windows (called views) that support the work in the primary window. In addition to the perspectives supplied by Eclipse and any Eclipse plug-ins you have installed, StreamBase Studio provides the following perspectives:
- SB Demos Perspective
-
Use this perspective to learn about StreamBase. The SB Demos perspective provides views and tools that demonstrate important StreamBase capabilities for the first-time user. SB Demos is the default perspective when you first run StreamBase Studio.
- SB Authoring Perspective
-
Use this perspective to design StreamBase applications in EventFlow format.
- SB Test/Debug Perspective
-
Use this perspective to run, test, and debug your applications by and to define and feed simulated input data to your running application.
- LiveView Perspective
-
Use this perspective to view a running LiveView fragment, display its tables, and run queries on those tables.
- SB Manager Perspective
-
Use this perspective to gather statistics about the operators and streams in a running application. This perspective is automatically run every time you launch a run, debug, or trace configuration in Studio.
You can also define you own perspectives, as described below in Custom Perspectives.
The perspective bar allows quick access to currently open perspectives, and provides an easy way to open a new perspective. If sized wide enough, it shows buttons for other available perspectives, as in this example:
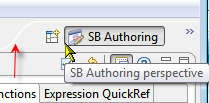 |
If your perspective bar is too narrow, widen it by dragging its inside edge (indicated by the red arrow above).
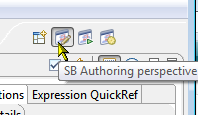
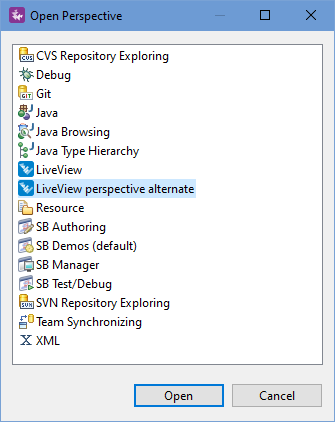
To open a different perspective, click one of the other perspective buttons. Or, click the ![]() Open Perspective button to select from a drop-down list of available perspectives.
Open Perspective button to select from a drop-down list of available perspectives.
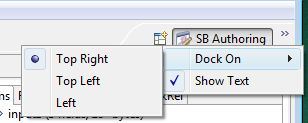
To change the docking location of the Perspective Bar, right-click the Open Perspective button. In the Dock On list (shown in the next figure), select Top Right, Top Left, or Left.
 |
Tip
To keep several StreamBase perspective buttons in the perspective bar at the same time, disable the Show Text option. You can hover the mouse over each perspective icon to identify it.
 |
You can create one or more custom perspectives based on your display preferences. For example, in the default SB Authoring perspective, you may prefer to not display certain views so that more space is available for the EventFlow Editor's canvas.
To customize a perspective, select > to define a new perspective that captures your preferences. Enter a new name for a custom perspective. Do not overwrite the default perspectives provided by StreamBase Studio. (If you inadvertently overwrite a default perspective, you can reset it to its originally installed layout and contents with >.)
When the new perspective is added, select it from the Perspectives button like any other perspective:
 |
You can rearrange the layout of StreamBase Studio as follows:
-
Drag views to different positions within the Studio window.
-
Drag views to the fast view bar to create a fast view.
-
Drag editors such that they are simultaneously visible beside, above, or below another editor.
-
Resize views and editors by dragging the sashes that separate them.
When dragging a view, drop cursors indicate where the view will dock when you release the mouse button. This indication is relative to the view or editor area underneath the cursor. The following table explains the drop cursors in StreamBase Studio.
 Dock above
-
The view will appear above the view underneath the cursor.
 Dock below
-
The view will appear below the view underneath the cursor.
 Dock to the right
-
The view will appear to the right of the view underneath the cursor.
 Dock to the left
-
The view will appear to the left of the view underneath the cursor.
 Stack
Stack-
The view will appear as a tab in the same pane as the view underneath the cursor.
From a view's title bar context menu, select Fast View to minimize the view as a button on the fast view bar. Fast views are discussed in Fast Views.
Double-clicking a view or editor's title bar maximizes the editor or view in the Studio window. Double-click again to restore the view.
From the context menu of a view or editor's title bar, select how you want the view to appear within the Studio window. The following table explains the view and editor title bar context menu options.
- Fast View (views only)
-
Minimizes the view and places a button for it in the fast view bar as described in Fast Views.
- Detached (views only)
-
Detaches the view from Studio into a window of its own. Use this on a view you use often to temporarily move it to another part of the screen, or to a second monitor. Restore a detached view back into Studio by clearing Detach from the context menu of the detached view's tab.
- Restore
-
Restores the view to its previous (not maximized or minimized) size and position in the Studio window.
- Move
-
Move the editor, view, or whole group. Alternative for views only: click and hold on the view's tab, drag the view to the desired position, then release the mouse button.
- Size
-
Resize the editor or view in the specified direction.
- Maximize
-
Maximizes the editor or view in the Studio window. Alternative: double-click the editor or view's tab, then double-click to restore.
- Minimize
-
Minimizes the editor or view in the Studio window.
- Close
-
Closes the editor or view.
- Close Others (editors only)
-
Closes all editors except the current editor.
- Close All (editors only)
-
Closes all editors.
- New Editor (editors only)
-
Opens a new, separate copy of the current editor session.