In this tutorial, we will build and run a simple application that takes a stream of stock trade data, and selects from it only trades above a certain number of shares. We will also create a feed simulator that enters test data into the running application so that we can verify whether the application works as expected.
Skip the following section if StreamBase Studio is already installed.
If you are a TIBCO customer, you can obtain TIBCO StreamBase products you are entitled to use by logging in at eDelivery.tibco.com.
If you are not an existing customer, you can obtain an evaluation copy of TIBCO StreamBase Standard Edition. You must first set up an evaluation account at eval.tibco.com. The evaluation license is good for 30 days and requires accepting a TIBCO End User License Agreement (EULA). A license file is posted with the software at the download site along with instructions for setup. The files are:
-
streambase-license.xml
-
license-install-instructions.txt
You can run StreamBase Studio and design applications without a license file, but before you can run or debug applications
in Studio, your license file must be copied to the etc directory of your installation. For details, see Configuring a StreamBase License.
-
Start StreamBase Studio as follows:
- On Windows 10
-
-
Invoke the Start menu, and begin typing
StreamBaseuntil one or more StreamBase selections appear. Select StreamBase Studio 7.7 from the results. -
From the desktop, double-click the StreamBase Studio desktop icon.
-
- On Windows 7
-
-
On the Start menu, select → → → .
-
From the desktop, double-click the StreamBase Studio desktop icon.
-
- On macOS
-
If your Mac is running 10.12 Sierra or later, see Starting StreamBase Studio on macOS Sierra before starting Studio the first time.
-
In macOS Finder, navigate to the StreamBase installation location and double-click StreamBase Studio 7.7.app. (The suggested installation location is a StreamBase folder in
/Users/.)sbuser/Applications -
Enter macOS Launchpad and type the first letters of
sbstudiountil you see the Studio icon. Double-click that icon when located.
-
- On Linux
-
StreamBase Studio is not formally supported on Linux, but is provided as an aid for deployment engineers who might need to adjust a StreamBase application's properties differently than received from development engineers. Launch Studio on Linux by entering the
sbstudio &command in a StreamBase-configured shell.
-
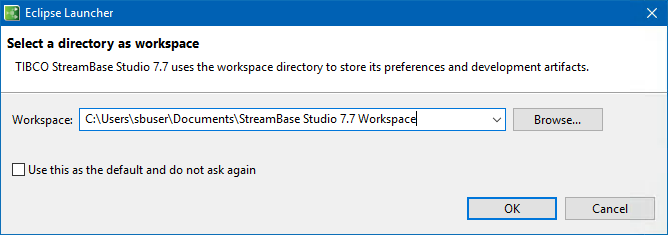
Choose a workspace
A workspace is a directory in your file system that contains the projects, files, and other resources that you create with StreamBase Studio. You can maintain more than one workspace, each with a different development focus, or each used with a different release of StreamBase.
When Studio starts, it prompts for the location of your initial workspace. On Windows:
On macOS:

Click to open StreamBase Studio using the default workspace path. If you are opening StreamBase for the first time, a new workspace is created and initialized with default StreamBase Studio settings. If you are using an existing workspace, all your files and any customized settings are preserved from the last time you used it.
To specify a non-default workspace, you can click to switch to a different, existing workspace, or enter the name of a new directory to create a new workspace.