Contents
The Palette view is displayed when you have an EventFlow application open in the EventFlow Editor. By default it opens in the lower left corner of the SB Authoring perspective, but as an alternative, the Palette can be docked inside the EventFlow canvas. The Palette provides easy access to StreamBase components, which you drag and drop onto the canvas to add to your application.
Only the EventFlow Editor has an associated Palette view. When no EventFlow Editor is open, or when a StreamSQL or text editor is active, the Palette view is not available.
When an EventFlow application is open, the Palette view displays a set of tokens that represent the different application components. You can drag a token into your EventFlow Editor to add an instance of that component to the canvas. The components are organized in three drawers in the Palette:
- Operators and Adapters
-
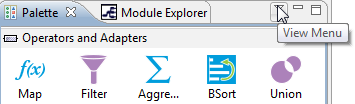
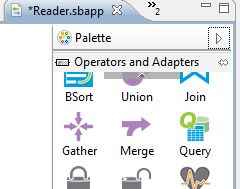
Contains StreamBase operators and module references, the basic building blocks of EventFlow applications. Its bottom-right icon (highlighted below) opens a dialog from which you select input adapters, output adapters, and global Java operators.
- Data Constructs
-
Contains StreamBase data constructs, which are used to store information processed by associated operators. See Using Data Constructs.
- Streams
-
Contains input and output streams, which represent entry and exit points into and out of an application, and contains error streams.
The palette with all drawers open is shown below.
 |
The Palette is active only when an EventFlow Editor is open and active. When no EventFlow Editor is open, the Palette view is empty.
Several icons in the Operators and Adapters drawer have different behavior than the other icons. Dragging one of the options in the following table to the canvas opens a dialog instead of dropping an icon on the canvas.
| Drag This Icon | Keyboard Shortcut | Opens this dialog |
|---|---|---|
| Adapter, Java Operator | A I | Insert Input Adapter |
| Adapter, Java Operator | A O | Insert Output Adapter |
| Adapter, Java Operator | O V | Insert Java Operator |
| Module | O E | File Chooser dialog showing the EventFlow and StreamSQL modules in the current module's module search path. |
| Extension Point | O X | File Chooser dialog showing the compatible StreamBase interface files in the current module's module search path. |
Dragging the Adapter, Java Operator icon to the canvas opens a dialog from which all Input adapters, Output adapters and Java operators are available. The keyboard shortcuts limit available choices in the dialog to the appropriate set of adapters or operators.
To add an input adapter, use the A I keyboard shortcut, or drag the Adapter, Java Operator icon to the canvas location where you want the adapter to appear, then release the mouse button. Either action opens the Insert Input Adapter dialog, which lists both Global Input Adapters and Project Input Adapters.
Similarly, to add an output adapter, use the A O keyboard shortcut or or drag the Adapter, Java Operator icon to the canvas.
The Project Input Adapters folder only shows content when project-specific custom adapters exist in the current module search path. Having custom adapters in the current Studio project presumes that the project has the StreamBase Client Library on its Java Build Path, so a reminder message shows if the Client Library is not found.
You can resize the dialog to see the adapter descriptions. Select an adapter line to see its long description above the button.
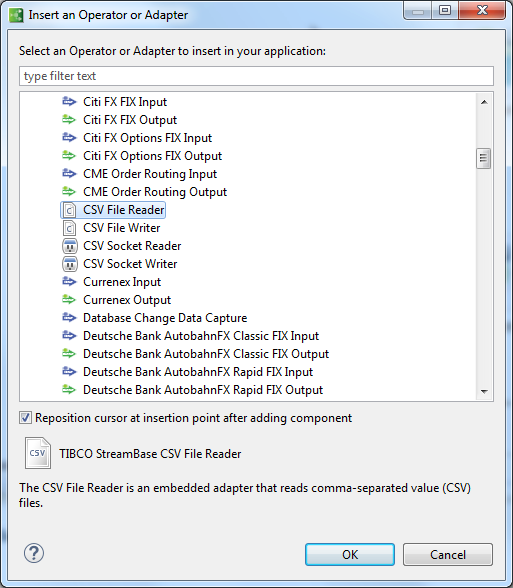
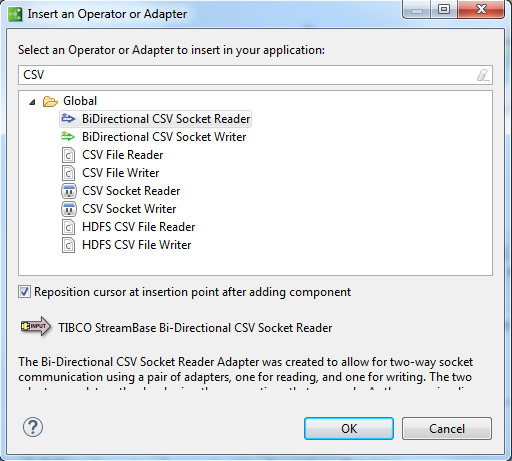
Type a search string in the filter field to narrow the list of adapters to those whose name matches your search string.
 |
Select the adapter of interest and double-click or click . This drops the selected adapter icon at the canvas location where you first dragged the Input Adapter icon, or near the last-clicked canvas location, if you used the keyboard shortcut.
The Reposition cursor at insert point option is selected by default, which allows you to immediately click to select the newly dropped adapter and show its Properties view. If you are adding several adapters with different search strings, unselect this option so that the cursor remains in the dialog.
The Insert Adapter dialog can also be used efficiently with keystrokes only. For example, to insert a CSV File Reader adapter
icon, with an EventFlow Editor active, type: a i csv Down-arrow Down-arrow Enter
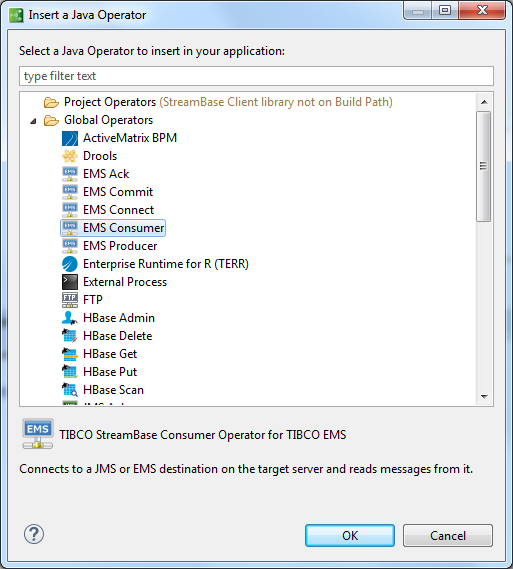
To add a global Java operator or a custom-written Java operator, use the O V keyboard shortcut, or drag the Java Operator icon to the canvas and release the mouse button. The Project Operators folder only shows contents if there are custom Java operators in the current project's module search path.
Dragging a Module icon to the canvas opens a File Chooser dialog showing all EventFlow and StreamSQL files in the current module search path (essentially duplicating in the dialog what the Module Explorer view shows). Dragging an Extension Point icon to the canvas opens a File Chooser dialog showing all interface files in the module search path.
In either case, select the desired module or interface, and a Module Reference or Extension Point is placed on the canvas, ready for final configuration. See Referencing a Module for the behavior differences between the two methods.
You can pin Palette view drawers open by clicking the pin button (circled in red in the following diagram) or by selecting Pinned from any drawer's context menu. The pin button appears in Palette drawer title bars only when the Palette Settings dialog specifies the option Close automatically when there is not enough room.

The state of pinned drawers is preserved separately for each EventFlow Editor tab. For an individual EventFlow module, the pinned state persists between Studio sessions.
You can achieve a similar state of Palette view open drawers by specifying Never close in the Palette Settings dialog (which removes the pin button). Then click to open each drawer, and it stays open for each EventFlow module for the duration of the current Studio session. However, drawers opened with this method do not persist between Studio sessions.
Right-click anywhere in the Palette view or docked palette and select one of the following menu items from the context menu:
-
Display icons and text in different ways.
-
-
: Displays the Palette Settings dialog, where you can specify default settings.
-
Pinned: Select to keep the current Palette drawer open even when opening other drawers. Only appears in the context menu when the Palette Settings dialog specifies the Close automatically when there is not enough room option.
Use the Palette Settings dialog to specify default settings for the currently open Palette view and for future Studio sessions. The dialog offers the following options:
-
Font: Specifies the font used to display labels in the Palette view. Click to select a font from the options available on your system.
-
Layout: Specifies the default icon layout.
-
Drawer options: Specifies whether you want Palette drawers to stay opened after use.
Instead of using the Palette view, you can dock the palette inside the EventFlow Editor. This lets you expand the EventFlow Editor to full screen without losing the Palette.
To dock the Palette view inside the EventFlow Editor, you can either:
-
Close the Palette view by clicking the X in its tab. This automatically docks the Palette.
-
Select the Menu View triangle in the upper corner of the Palette view, and select Dock in Diagram Editor (closes view) from the drop-down menu:
To end Palette docking and restore the Palette view:
-
From Studio's top-level menu, select → → .
The Palette is docked by default in collapsed state on the right side of the EventFlow Editor. To expand or collapse a docked Palette, click the Show Palette arrowhead.
Click the light gray bar at the top or bottom to scroll the palette. Drag its free vertical edge to widen or narrow it. To dock the palette on the opposite side of the Editor, drag the Palette bar or right-click the Palette title bar and select Dock on from the context menu.
The open Palette drawer may show a scroll control at the top or bottom of the drawer.