This topic shows the steps to complete the simple stock trading application begun on the previous page.
-
Add and configure a Filter operator:
-
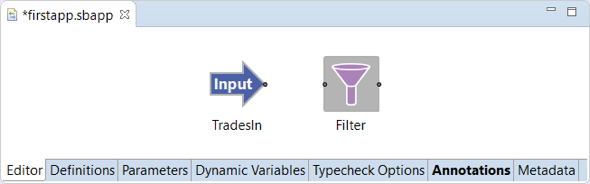
From the Operators and Adapters drawer of the Palette view, drag a Filter operator onto the canvas. Its default name is Filter. The canvas should now look similar to this:
-
Notice the Outline view on the right side of the canvas, which provides a tree view of all the components in your module. This view can be helpful for navigating large modules with many components.
-
Double-click the Filter instance on the canvas (or in the Outline view) to select the component and opens its Properties view.
-
Rename the operator to
TradeFilter, using either the canvas or the General tab of the Properties view. -
Select the Predicate Settings tab. Notice that a row in the Predicates table exists for output port 1, with the predicate expression
true. Edit this expression in the Predicate column, and specify:quantity >= 10000A predicate is a StreamBase expression that resolves to either
trueorfalsefor field values in an incoming tuple. A predicate expression can include variables or constants defined within the scope of a module or operator. We are specifying a predicate that resolves totruefor tuples containing trades of 10000 shares or more. For tuples having a smaller quantity, the predicate expression returnsfalse. -
As currently configured, the
TradeFilteroperator discards tuples whosequantityvalue is less than 10000. Instead of discarding them, select the checkbox for the option Create output port for non-matching tuples. This creates output port 2.
At this point, your Filter operator's Properties view looks like the following:

At run time, the Filter operator evaluates each tuple as it arrives from the Input Stream. If you had defined multiple predicates, they would be evaluated in order. The first predicate that returns
truecauses the operator to emit the tuple on its output port immediately, and any later predicates are ignored.We have only one predicate, so each tuple is dequeued either on output port 1 if
true, or on output port 2 iffalse. -
-
Connect the Input Stream and Filter operator.
The canvas shows input and output ports as small black squares. Input ports are on the left side of components and output ports are on their right side. If there are multiple ports, the uppermost square represents port 1. The next square down represents port 2, and so on. Your Filter operator now has an extra output port, which you configured in the previous step.
On the canvas, click and hold the output port at the tip of the
TradesInarrow and drag the resulting arc to the input port onTradeFilter.Arcs represent internal streams within EventFlow modules. When you connect the two components, the input stream and the filter operator backgrounds turn white, indicating that the operation has successfully passed typechecking.

-
Add and connect the output streams:
-
Drag an Output Stream icon from the Palette view into the canvas, and drop it on the right of the Filter operator. Rename this stream
BigTrades. -
In the canvas, draw an arc from the upper output port of the Filter operator to the input port of the
BigTradesoutput stream. When you hover the mouse pointer over the black dot at the left end of the arc you just inserted, the canvas looks similar to the following.
-
Add a second Output Stream in the same way, dropping it below the
BigTradesoutput stream. Change the new stream's name toAllTheRest. -
Connect the lower output port of the Filter operator to the
AllTheRestOutput Stream.The final layout of your EventFlow module should look similar to the following:

-
-
Optional. If your canvas looks a little disorganized, try one or both of these adjustments:
-
To automatically arrange the components neatly on the canvas, select > or press Ctrl+L (Windows) or command+L (macOS).
-
To rearrange the arcs around components (such as when an arc overlaps a component's name), select >.
-
-
Use >, Ctrl+S, command+S, or click the Save button in the Studio toolbar to save your EventFlow module.