The TIBCO StreamBase® Twitter Output Adapter allows a StreamBase application to connect to the web service provided by Twitter, Inc. to send Twitter status messages, commonly called tweets.
The adapter must be configured with the correct OAuth tokens to be able to perform its operations. The OAuth can be set up in the security tab. See Obtaining Twitter OAuth Tokens for instructions.
The adapter has samples, described in Twitter Adapter Samples.
Fields in schemas used by the Twitter adapters correspond to attributes in JSON-encoded tweets accessed via Twitter4J library calls. The library is provided with StreamBase. To help you understand what fields in schemas represent, the following table summarizes Twitter objects and attributes, and provides links to their documentation at dev.twitter.com.
| Object | Example Attributes | Reference |
|---|---|---|
| Tweet | id, following, followers_count, geo_enabled, status | Platform Objects:Tweets |
| User | id, following, followers_count, geo_enabled, status | Platform Objects:Users |
| Geo Place | country_code, locality, region, street_address, postal_code | Platform Objects:Places |
| Entity | hashtags, media, urls, user_mentions | Platform Objects:Entities |
Briefly,
-
Tweets are the basic atomic building block of all things Twitter. Users tweet Tweets, also known more generically as status updates. Tweets can be embedded, replied to, favorited, unfavorited and deleted.
-
Users can be anyone or anything. They tweet, follow, create lists, have a home_timeline, can be mentioned, and can be looked up in bulk.
-
Places are specific, named locations with corresponding geo coordinates. They can be attached to Tweets by specifying a place_id when tweeting.
-
Entities provide metadata and contextual information about content posted on Twitter and are not autonomous objects.
Schemas for the StreamBase Twitter adapters encode a large subset of attributes for these objects. You can modify the schemas to include others.
This section describes the properties you can set for this adapter, using the various tabs of the Properties view in StreamBase Studio.
Name: Use this required field to specify or change the name of this instance of this component, which must be unique in the current EventFlow module. The name must contain only alphabetic characters, numbers, and underscores, and no hyphens or other special characters. The first character must be alphabetic or an underscore.
Adapter: A read-only field that shows the formal name of the adapter.
Class name: Shows the fully qualified class name that implements the functionality of this adapter. If you need to reference this class name elsewhere in your application, you can right-click this field and select Copy from the context menu to place the full class name in the system clipboard.
Start with application: If this field is set to Yes (default) or to a module parameter that evaluates to true, this instance of this adapter starts as part of the JVM engine that runs this EventFlow module. If this field is set to
No or to a module parameter that evaluates to false, the adapter instance is loaded with the engine, but does not start until you send an sbadmin resume command, or until you start the component with StreamBase Manager.
Enable Error Output Port: Select this check box to add an Error Port to this component. In the EventFlow canvas, the Error Port shows as a red output port, always the last port for the component. See Using Error Ports to learn about Error Ports.
Description: Optionally enter text to briefly describe the component's purpose and function. In the EventFlow canvas, you can see the description by pressing Ctrl while the component's tooltip is displayed.
| Property | Description |
|---|---|
| Enable Status Port | Enables the status output port. |
| Log Level | Controls the level of verbosity the adapter uses to send notifications to the console. This setting can be higher than the containing application's log level. If set lower, the system log level is used. Available values, in increasing order of verbosity, are: OFF, ERROR, WARN, INFO, DEBUG, TRACE. |
| Property | Type | Description |
|---|---|---|
| Twitter Consumer Key | string | Obtain Consumer Key from app @ developer.twitter.com |
| Twitter Consumer Secret | string | Obtain Consumer Secret from app @ developer.twitter.com |
| Twitter Access Token Secret | string | Obtain Access Token Secret from app @ developer.twitter.com |
| Twitter Access Token | string | Obtain Access Token from app @ developer.twitter.com |
Use the Concurrency tab to specify parallel regions for this instance of this component, or multiplicity options, or both. The Concurrency tab settings are described in Concurrency Options, and dispatch styles are described in Dispatch Styles.
Caution
Concurrency settings are not suitable for every application, and using these settings requires a thorough analysis of your application. For details, see Execution Order and Concurrency, which includes important guidelines for using the concurrency options.
-
Command, string. The command to send to the adapter. Specify one of the following:
-
Tweet — Tells the adapter send a tweet based on the current OAuth credentials and Tweet field.
-
**(Deprecated)DirectMessage — Tells the adapter send a direct message to another user, based on the current OAuth credentials and DirectMessage field.
-
Retweet — Tells the adapter to retweet a tweet identified by its tweetId, based on the current OAuth credentials and RetweetId field.
-
-
Tweet, Tuple. The tuple that makes up the new tweet. This field is only used when Command is Tweet.
-
Status, string. The text of the new status, commonly know as a tweet.
-
Longitude, double (optional). The longitude coordinate of this message. Note that this only takes effect if the security level of the account allows geo locations.
-
Latitude, double (optional). The latitude coordinate of this message. Note that this only takes effect if the security level of the account allows geo locations.
-
PlaceId, string (optional). The place ID that can link this status update to a place.
-
InReplyToStatusId, long (optional). The status update (tweet) that this status update is in reply to.
-
PossiblySensitive, boolean (optional). A flag to determine whether Twitter should treat this status as possibly sensitive.
-
DisplayCoordinates, boolean (optional). A flag to determine whether Twitter should display the coordinates attached to this update to other users.
-
-
**(Deprecated)DirectMessage, Tuple. The tuple that makes up the direct message. This field is only used when Command is
DirectMessage.-
ScreenName, string. The username of the user to send this direct message to.
-
Text, string. The text of the direct message to send.
-
-
RetweetId, long. The ID of the tweet to be retweeted. This field is only used when Command is
Retweet.
The Twitter adapter must be configured with valid Twitter OAuth consumer and access tokens, obtained without charge from Twitter's developer web site. Twitter OAuth tokens encapsulate the login credentials for one Twitter account. The tokens encapsulate your Twitter account's authentication rights without storing or requiring your account's password, and thereby remain effective even when you change your Twitter password. For additional details, see the Twitter OAuth documentation.
Follow the steps below to obtain OAuth tokens from Twitter.
-
Decide in advance which Twitter account you will use for communication with your StreamBase application. You probably do not want to use a personal account for business communication, so set up a new business Twitter account if one does not already exist.
-
Proceed to http://dev.twitter.com and use the Sign in link to log in with the designated Twitter account.
-
Your Twitter account name is now displayed where the sign-in link was. Hover over it to display a context menu and select My Applications.
-
Click the Create a new application link. This opens a form titled Create an Application.
-
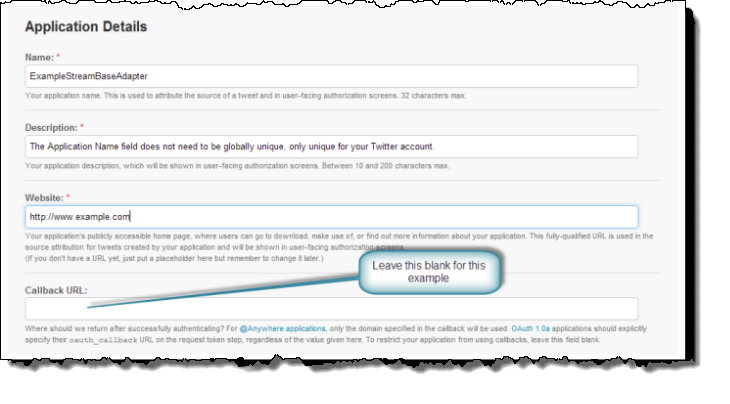
Fill in a Name. This name must be unique for the logged-in Twitter account.
-
Fill in the Description field. Twitter requires at least 10 characters in this field.
-
Provide a URL in the Website field.
-
For this example, leave the Callback URL blank.
-
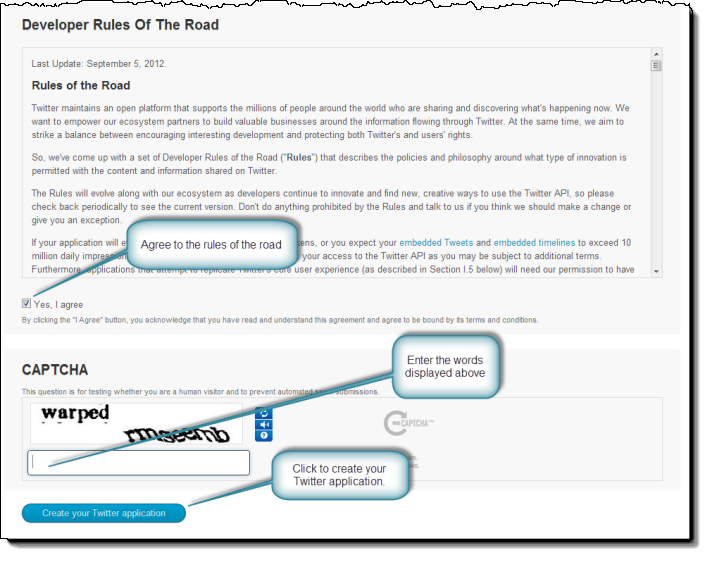
Accept the Develop Rules Of The Road by checking the Yes, I agree box.
-
Provide the CAPTCHA response.
-
Click the Create your Twitter application button.
-
-
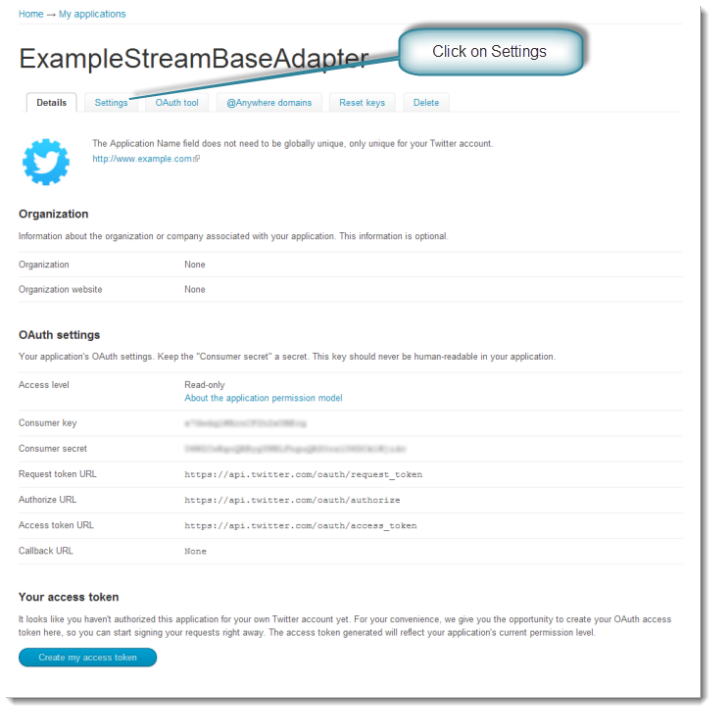
The application has been created. You will see the screen shown below. Click the Settings tab.
-
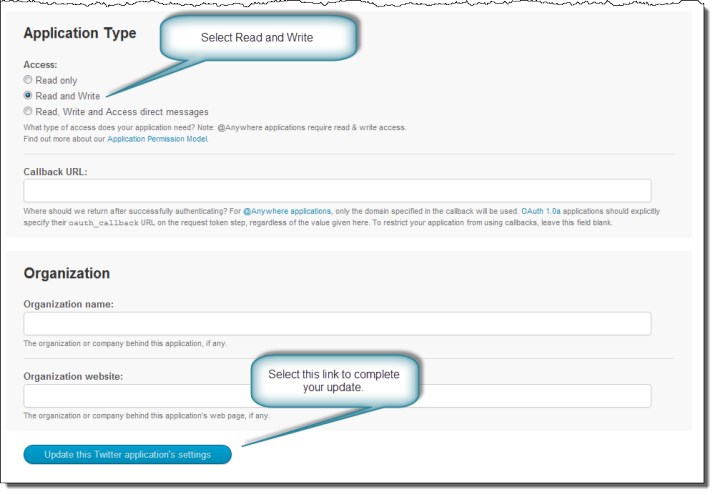
Under the Application Type section select the Read and Write radio button (Note: if you plan to send and receive direct messages with your application, you must instead select Read, Write and Access direct messages). This allows your application to receive and post tweets. Click Update this Twitter application's settings to complete the update.
-
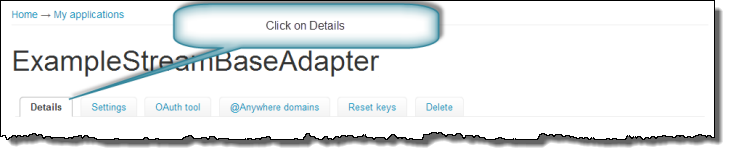
Click the Details tab.
-
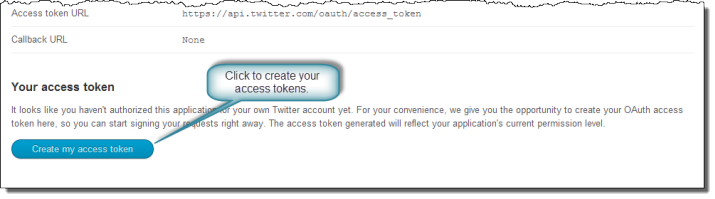
At the bottom of the page click Create my access token tab.
-
Copy, label, and save the Consumer Key , Consumer Secret , Access Token and Access Token Secret strings provided on this page. You will need to enter these tokens in your application's
sbd.sbconffile.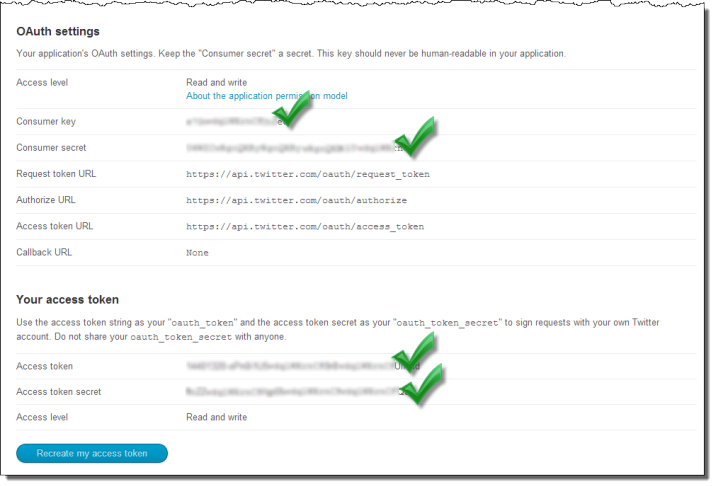
**: User Streams and legacy Direct Message endpoints have been turned off by Twitter https://twittercommunity.com/t/details-and-what-to-expect-from-the-api-deprecations-this-week-on-august-16-2018/110746.