Contents
LiveView Desktop lets you view and analyze your data. You can use LiveView Desktop to issue queries to LiveView Server, receive query results in tabular or chart form, format data visualizations, and configure table actions.
When LiveView Desktop is running on your system, your visual layout along with your session actions are saved in a folder on your file system. This folder stores all the aspects of your workspace, that is, all the query and visual display information associated with a LiveView Desktop session. LiveView Desktop defaults to storing your workspaces under your user's Documents folder, in a folder named TIBCO LiveView Workspaces. LiveView Desktop is capable of downloading workspaces from LiveView Server as part of its startup.
Each workspace saved on your system contains your customizable perspectives. A perspective is the visual arrangement of open sub-windows called views. A view is a part of your workspace that can display information.
LiveView Desktop perspectives allow you to customize your available views. Every perspective stored in your workspace has a layout and a name. Within every default LiveView Workspace, you have a default perspective named Main. You can return to the Main perspective by clicking the Main button in the top-left corner of the desktop.
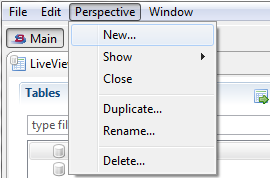
LiveView Desktop's Perspective menu offers options for controlling perspectives within your current workspace.
 |
This example demonstrates how to use and create a several perspectives for the Hello LiveView sample.
Load and run the Hello LiveView sample as delivered with LiveView, and view the resulting tables with LiveView Desktop. Follow these steps:
-
Start StreamBase Studio in the SB Authoring perspective.
-
Load the Hello LiveView sample:
-
Select → from Studio's top-level menu.
-
Enter
helloin the filter field to narrow the selection. -
Select the sample whose description is
Shows a simple Hello World applicationfrom the TIBCO LiveView category. -
Click .
The Hello LiveView sample loads into Studio with the project name
sample_lv-helloliveview. If you already have a project folder of that name, Studio adds a counter digit to the folder name and adds a new project. -
-
In the Package Explorer view, select the name of the project, right-click, and from the context menu, select → . The Console view shows several messages as the LiveView Server compiles the project and starts. This startup process can take several minutes, depending on the configuration of your computer.
-
When you see the message
All tables have been loadedin the Console view, start LiveView Desktop with one of the following methods:-
On Windows and Linux, if your StreamBase Studio sample project folder includes
Start LiveView Desktopentries, then a Run Configuration entry was automatically added to Studio when you loaded the sample. In this case, the simplest way to start LiveView Desktop is to invoke → → . -
On macOS, only if LiveView Desktop is installed in the canonical location in
STREAMBASE_HOME/liveview/desktop, you can invoke → → .Otherwise, use Spotlight or Launchpad to locate and invoke the app named
liveview. -
On Windows, you can also invoke → → → → .
-
On Linux, you can also run the following command:
/opt/tibco/sb-cep/
n.m/liveview/desktop/liveview &
Any of these methods opens the Connect to LiveView dialog.
-
-
In the Connect to LiveView dialog, select the radio button for Download and click .
-
Select the workspace named
Hello LiveViewand versionLatest. -
Click . This returns you to the Connect to LiveView dialog. The Download field now contains
Hello LiveView (Latest). -
Click .
LiveView Desktop opens on the preconfigured workspace. The Main perspective shows multiple grid and charting views.
-
Create a new perspective called Grid Views.
-
Select → and enter Grid Views in the Create New Perspective dialog.
-
Open grid views for the LVAlerts tables by double-clicking the table name in the Tables pane.
-
-
Re-open the Main perspective from the Show menu.
Select → and choose Main.
-
Save the current perspective as LVAlerts Startup.
Select → and enter LVAlerts Startup in the Duplicate Perspective dialog.
Notice within the Hello LiveView sample's workspace the following additional perspectives, which you can also customize into new perspectives:
-
Calculated Column: demonstrates two ItemSales table queries. The first calculates the remaining inventory on hand, and the second calculates the dollar value of the remaining inventory, based on simulated transactions. For more information about calculated columns, see LiveQL Syntax Reference.
-
Pivot Queries: the Track product quantity based on category query demonstrates a pivot query to the ItemSales table. For more information about pivot queries, see Pivot Queries.
Your workspace now has several perspectives available. The next time you open the local copy of your Hello LiveView workspace, these perspectives will be available. For example, you can close LiveView Desktop and re-open it on the local workspace.
-
Close LiveView Desktop.
-
Open LiveView Desktop. In the LiveView Desktop start dialog:
-
Select the radio button for Local.
-
Select the name Hello LiveView from the pull-down menu for the Local field.
-
Warning
If you choose to download the sample workspace from the LiveView Server instance the next time you open LiveView Desktop, download the workspace to a different location on your local machine, or your changes will be overwritten.