Contents
This tutorial page describes how to use StreamBase Studio and, optionally, the mvn command to build a runnable archive of a StreamBase Application with LiveView fragment, then automatically package and install that archive into a Docker container.
On this tutorial page, you will:
-
Configure a StreamBase Application running the Hello LiveView fragment.
-
If you prefer to start with an Application running an EventFlow fragment, open this page instead.
-
-
Use StreamBase Studio or the mvn command to build a Docker-ready Image for that application.
-
Automatically install this image into a Docker container managed locally in Docker Desktop.
To configure a StreamBase application for Docker, you must have:
-
StreamBase Studio.
-
Docker Desktop for Mac or Windows installed and running.
-
A currently active Internet connection.
Third-Party Software
When you obtain third-party software or services, it is your responsibility to ensure that you understand the license terms associated with such third-party software or services and comply with such terms.
See the Docker Desktop Notes on the EventFlow in Docker page to understand the Docker Desktop requirements.
Important
You must configure Docker Desktop to run with at least as much local system memory as your StreamBase Application requires, plus local Docker overhead. LiveView fragments are especially sensitive to this setting. You will NOT be able to run even the smallest LiveView fragment with the default Docker Desktop settings.
In general, look at the LiveView fragment's LiveView engine configuration file for the -Xmx setting in the LDMEngine>jvmArgs array. Configure Docker Desktop to use your -Xmx value plus about 2 GB. For all LiveView fragments, including the one in this tutorial, open Docker Desktop's Preferences dialog, open the Resources menu, and change the Memory slider to at least 5.00 GB. Set the CPUs slider to the number of cores in your machine's CPU or fewer. These requirements are cumulative for every container you try to run at the same time.
 |
-
From StreamBase Studio, select >
In the search field for the StreamBase Sample Importer dialog, type
helloto narrow the list of options. Select theHello LiveViewsearch result, then click .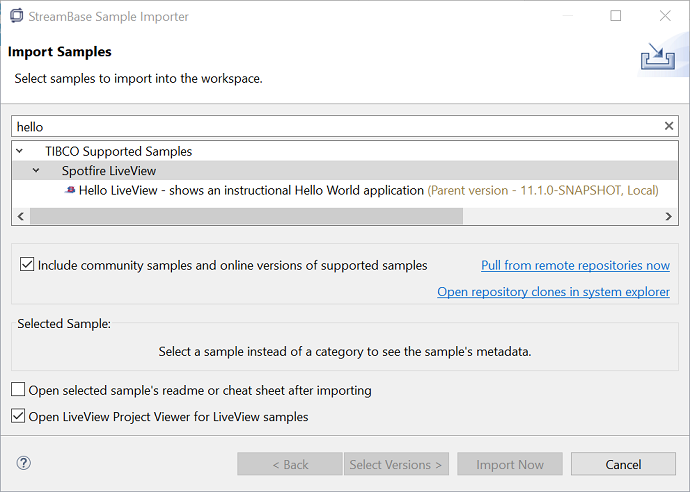
-
It may take some time for Studio to build the loaded project the first time, as it resolves and copies Maven dependencies. The project is ready when there are no red marks on any folder or file of the
sample_lv_sample_helloliveviewproject in the Project Explorer view.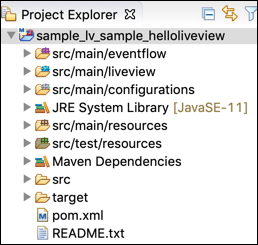
In a change from previous releases, LiveView fragments running in a Docker container are no longer automatically assigned the client API listening port 11080 by default. Thus, starting with versions 10.6.0, you must explicitly assign a listening port for each LiveView fragment that will run inside a Docker container.
Do this by including a simple ldmclientapilistener configuration file in the fragment project's src/main/configurations folder in StreamBase Studio. For example, copy the following into a file named ldmapilisten.conf in the configurations folder for the sample_lv_sample_helloliveview project.
name = "ldmapilisten"
type = "com.tibco.ep.ldm.configuration.ldmclientapilistener"
version = "1.0.0"
configuration = {
    ClientAPIListener = {
        portNumber = 11000
    }
}
This tutorial uses port 11000 to easily distinguish it from any non-Docker LiveView fragments you may have running locally.
You must use Maven to build and install the fragment project before packaging and installing the StreamBase Application project that contains the fragment.
Note
This step is not required before packaging application projects for regular use without Docker. In that case, the packaging wizard, described below, installs all dependent fragments as part of the packaging.
If you are comfortable working at the command prompt, follow these steps:
-
At the command prompt, navigate to the workspace location for this
sample_lv_sample_helloliveviewproject. -
Run the following command:
mvn clean install -DskipTests
-
Look for the
BUILD SUCCESSmessage. -
Proceed to the next section.
If you prefer to work in StreamBase Studio, follow these steps:
-
In the Project Explorer view, select and right-click the
sample_lv_sample_helloliveviewfolder. Select >(Be sure to select the option with the three dots. If you inadvertently run the other Maven build option and it fails, come back to this point and start over.)
-
In the Edit Configuration and launch dialog:
-
In the Goals field, enter
clean install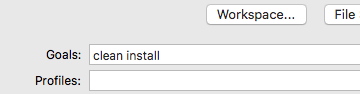
-
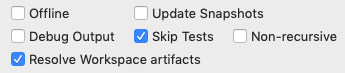
Select the Skip Tests and Resolve Workspace artifacts checkboxes.
-
Click , then click .
-
-
Keep an eye on the Console view as messages scroll by. Look for the BUILD SUCCESS message.
[INFO] ------------------------------------------------------------------------
[INFO] BUILD SUCCESS
[INFO] ------------------------------------------------------------------------
[INFO] Total time:  4.980 s
[INFO] Finished at: 2020-05-16T08:12:18-04:00
[INFO] ------------------------------------------------------------------------
-
Proceed to the next section.
The steps in this section create a StreamBase Application project with its Docker option enabled.
-
Optional. Open the
sample_lv_sample_helloliveviewproject's/src/main/eventflowfolder to make a note of the Group ID used by the LiveView fragment project. We will use a portion of the same Group ID when creating the Application project. -
Select >>.
-
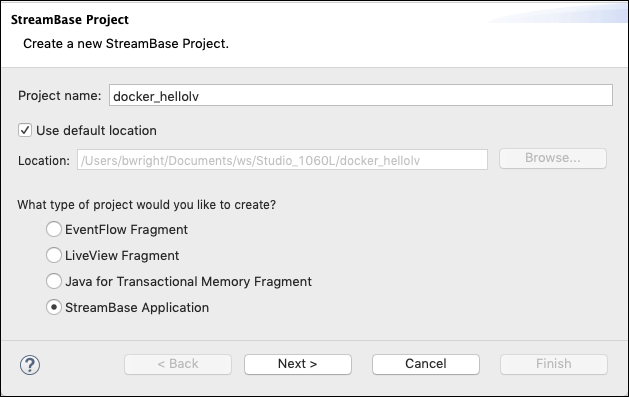
In the StreamBase Project dialog, enter a project name. This tutorial uses
docker_hellolvthroughout. -
Select the StreamBase Application option.
-
Click Next. (If you click in error, start over.)
-
In the Configure Maven Artifact panel, change the value of the Group ID to
com.tibco.ldm.sampleto match the first part of the Group ID of the fragment sample as determined in step 1. (You are not required to use the same Group ID for an Application project as for its dependent fragment projects, but doing this brings clarity to the process.)Select the Enable Docker support check box. This is the entire difference between building an application that runs locally and one that runs in a Docker container.
Optional. This tutorial suggests changing the Version number to
1.0.0to save some typing with upcoming Docker commands, but that is not required.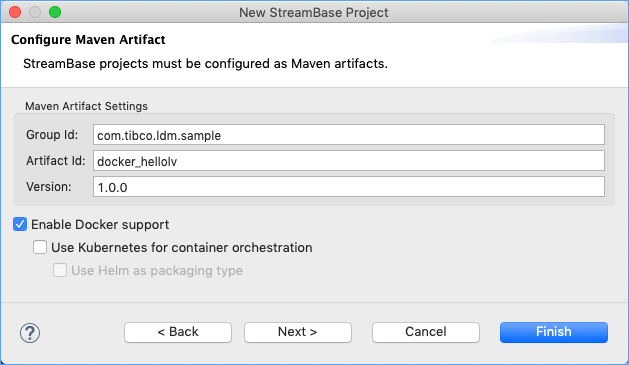
-
Click .
-
Optional. Make changes In the Archetype Properties panel as needed, following the guidelines in the table below.
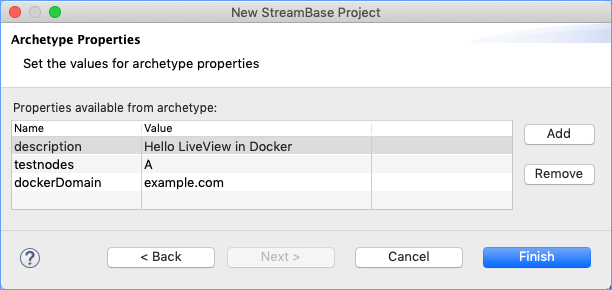
Property Default Description description My ApplicationEnter any text to characterize this application and distinguish it from other applications in your network. This string ends up in the <description>element of your application project'spom.xmlfile.testnodes A,B,CSpecify one or more node names for test nodes that are started when you run Maven Test or another Maven goal that requires Test. You can reduce project build time at the expense of test coverage by replacing the default three nodes, A,B,Cwith justA.dockerDomain example.comSpecify a domain name that will allow your Docker containers to communicate with each other. The domain name you specify here is configured into a TrustedHostsconfiguration file for this application. This allows all StreamBase Runtime nodes to participate in the same domain as the Docker containers, which allows node-to-node communication to occur without user authentication for nodes in the same Docker network. Members of this domain will be trusted hosts for each other.To take advantage of this feature, use the
--networkand--hostnameoptions in yourdocker runcommand, as described in Configuring Multiple Docker Containers.activationserviceurls None When this property is set, the corresponding activation.service.urlsvalue in the project'spom.xmlis updated accordingly.locallicensedirectory None When this property is set, the skip.require.activation.service.urlsproperty in thepom.xmlis updated, and thelocalLicenseDirectoryentry in thelicense.conffile is set to the specified value.sample falseThis property only appears when you select the Kubernetes and/or Helm checkboxes on the Configure Maven Artifact panel. TIBCO personnel only can change this value to truewhen configuring a sample to be delivered to thetibco-streaming-samplesrepository on GitHub. Thetruesetting performs two actions:-
The
<artifact>child element of the<parent>element in the application'spom.xmlfile is filled withep-application-docker-samplesinstead ofep-application-docker, which allows the sample to build correctly with GitHub's continuous integration system. -
Each configuration, Markdown, Dockerfile, and POM file in the project is prepended with a TIBCO-specific copyright header section.
-
-
Click . (Also click if prompted with a follow-up dialog.)
This creates a new project named
docker_hellolvin the Project Explorer view.
The next step is to configure docker_hellolv application project to be aware of its Maven dependency on the sample_lv_sample_helloliveview LiveView fragment project.
-
Select the
docker_hellolvproject name in the Project Explorer view. Right-click and select >. -
Studio shows a message dialog like the following.
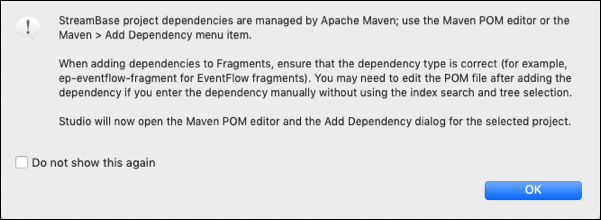
When you click , Studio performs the following actions:
-
Opens the POM Editor for the application project's
pom.xmlfile. -
Switches to the Dependencies tab of the POM Editor.
-
Opens the Add Dependency dialog,
-
-
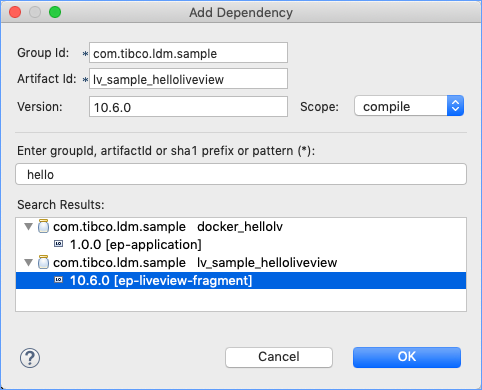
In the Add Dependency dialog, type
helloin the Enter groupId filter field. -
The dialog shows two entries that match, the current application project and the fragment project you loaded in above. Select the fragment project, and open the arrowhead on its left.
If there is more than one
ep-liveview-fragmententry (perhaps because your local Maven repository has artifacts from previous StreamBase releases), select the entry whose version number matches the current StreamBase release.Click .
-
Confirm that the
pom.xmlfile for thedocker_hellolvproject is saved.
Perform a Maven-install operation to package your StreamBase Application project into an archive file, then package the archive into a Docker container image, then install the container image into your local Docker Desktop environment.
If you are comfortable working at the command prompt, follow these steps to build and install your Docker image:
-
At the command prompt, navigate to the workspace location for this
docker_hellolvproject. -
Run this command:
mvn clean install -DskipTests
-
Look for the
BUILD SUCCESSmessage. -
Proceed to Confirm Local Docker Image.
If you prefer to work in the context of StreamBase Studio, follow these steps to build and install your Docker image:
-
Make sure your development machine is connected to the Internet. This procedure runs best with no
settings.xmlfile in your local~/.m2directory, or with a minimal one. -
Important! Make sure your Docker for Windows or Docker for Mac installation is currently running.
-
In the Project Explorer view, select and right-click the
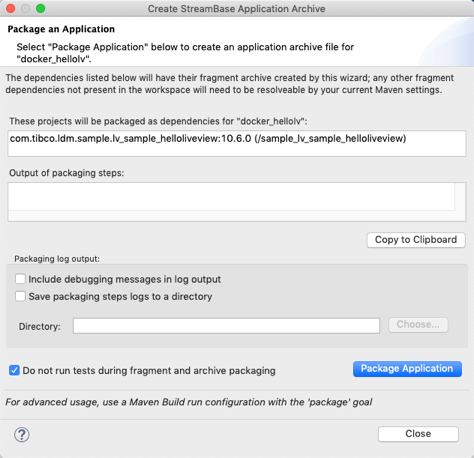
docker_hellolvfolder. Select >. -
This opens the Package an Application dialog.
-
There is nothing to configure on this dialog (unless something went wrong in a previous run), so click .
-
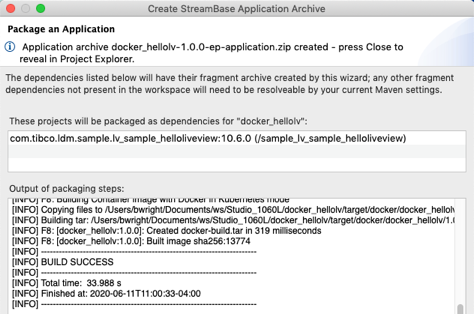
Keep an eye on the Output of packaging steps (which has the same content as the Console view) as messages scroll by. Look for one BUILD SUCCESS message for the fragment included in the application, plus a final BUILD SUCCESS message for the application.
-
Proceed to the next section.
To confirm success, open a StreamBase Command Prompt (Windows) or a StreamBase-configured Terminal window (macOS).
Get a list of your currently installed Docker images using the docker images command:
REPOSITORY       TAG      IMAGE ID         CREATED             SIZE
docker_hellolv   1.0.0    08277a6d9592     23 minutes ago      848MB
sbrt-base        10.6.0   c39719f31fba     2 hours ago         828MB
Your images list may include other Docker images from running the Docker Getting Started tutorial, from the EventFlow fragment tutorial,
or from Kubernetes setup. The three images listed above are the ones generated by the steps on this page.
This concludes the work in StreamBase Studio or the command prompt to generate the StreamBase Application archive for a LiveView fragment and package it into a Docker image in your local Docker environment.
The tutorial continues:
-
On the next page to demonstrate using Docker commands to run this image and communicate with the containerized StreamBase Application. Click at the bottom right of this page.
-
On the the page after next, to connect to the running containerized Hello LiveView sample with a web browser.
-
You can also jump back to go through similar steps as this page, except for an EventFlow fragment.