Contents
StreamBase projects use the Java Build Path to locate Java classes referenced by your Java source code. You must add entries to this project's Java build path if this project will use:
-
The StreamBase Client Library
-
The StreamBase Test Library
-
A JAR file that implements a custom Java operator or adapter you have written
-
Any third-party JAR file that implements functionality called your custom Java operator or adapter
-
Any other Java classes referenced by your Java code
If your StreamBase project contains Java source files in the java-src directory of your project, the classes in those files are automatically compiled into .class files, which are placed in the java-bin folder of your project. The java-bin folder does not appear in the Package Explorer.
You can use the Source tab of the Java Build Path panel to manage special cases.
When you add another project in your workspace to the Java build path of the current project, it makes the other project's resources available to the current project.
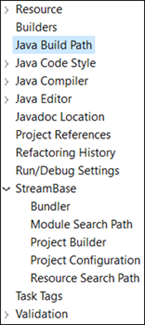
To specify the Java build path, open the Project Properties dialog for the Studio project of interest as described in StreamBase Project Properties. Select Java Build Path from the contents column on the left.
 |
Next:
-
Open the Projects tab.
-
Click the button.
-
Select the projects in your workspace to add, then click .
If your project includes a custom Java operator or adapter, it must reference classes in the StreamBase Client Library. If your project will include a StreamBase Unit Test, it references classes in the StreamBase Test Library.
The Client Library and Test Library can be added to a project's Java build path at project creation time, if you use the New StreamBase Project wizard. You can add either Library to the build path at any time with the following steps:
-
In the project's Properties dialog, open the Java Build Path panel as described in the previous section.
-
Open the Libraries tab.
-
Click the button.
-
Select StreamBase Client (or StreamBase Test Support) and click .
-
On the next dialog panel, click .
-
Click .
To use the StreamBase JUnit Test feature, you must add the JUnit library to an existing project in addition to the StreamBase Test library. Use the steps above, modified as follows:
-
At step 4, select JUnit.
-
Click .
-
On the second panel, select JUnit 4 from the drop-down list.
-
Click .
Your Java code may reference a third-party library packaged as a JAR file, or your site may have implemented a custom operator or adapter as a JAR file for ease of distribution.
Add any JAR file to the current project's Java build path with the following steps:
-
In the project's Properties dialog, open the Java Build Path panel as described in Adding Another Project to the Java Build Path.
-
Open the Libraries tab.
-
Click the button.
-
Open the workspace folder that contains your JAR file.
-
Select the JAR file and click OK.
-
Click .
If the JAR file resides outside the Studio workspace, use the button instead, and navigate to the location of the JAR file.
Your Java code or a JAR file in your project might call a native library (DLL or .so file). You can specify the location of such resources with the <library> child element of the <java-vm> element of the server configuration file.
You can also specify the location of native libraries directly in the Java Build Path panel of the Project Properties dialog.
To specify a native library used by source code in your project:
-
In the project's Properties dialog, open the Java Build Path panel as described in Adding Another Project to the Java Build Path.
-
Open the Source tab.
-
Open the folder representing the project's
java-srcfolder. -
Select Native library location and click .
-
In the Native Library Folder Configuration dialog, specify the path to the native library file.
-
Click .
To specify a native library used by a JAR file in your project:
-
In the project's Properties dialog, open the Java Build Path panel as described in Adding Another Project to the Java Build Path.
-
Open the Libraries tab.
-
Open the folder representing a JAR file added to the project.
-
Select Native library location and click .
-
In the Native Library Folder Configuration dialog, specify the path to the native library file.
-
Click .