Contents
StreamBase allows you to record data enqueued onto one or more input streams, and subsequently play the recorded data back on the same application, at the original speed or an accelerated speed. Among its many uses, this feature allows you to test alternative processing strategies in the StreamBase operators, to see the effect of changes, given the same set of recorded data. This topic explains how you can use the graphical Recordings View in StreamBase Studio, or the corresponding, command-based sbrecord and sbfeedsim features in a terminal windows.
By default, the Recordings View is located near the upper left corner of the SB Test/Debug perspective.
To record tuples using the Recordings View, an application must be running. The sequence of steps is:
-
Start the StreamBase Server for an EventFlow or StreamSQL application. (See Running Applications in Studio for instructions.)
-
In the Recordings View, click the button.

-
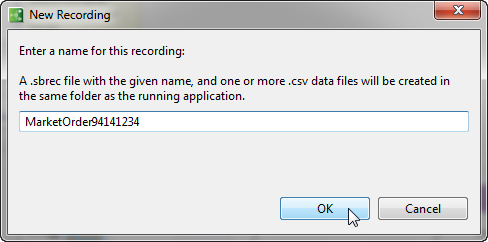
In the New Recording dialog, accept the provided default file name for your recording, or enter a new name, as shown below.
-
Click .
-
The Recording begins when StreamBase detects that data has been enqueued onto one of the input streams of the running application. Enqueue data to an input stream; for example, you can start a Feed Simulation for a specific input stream, as described in Running Feed Simulations.
-
If the application has more input streams, you can record the data sent to them as well. For each input stream, StreamBase creates a separate comma-separated value (CSV) file. By default, each CSV file is named
applicationName-timestamp-streamName.csv -
When you have finished recording the inbound data, click the button on the Recordings View.
-
You can now replay the recording on the StreamBase application.
The Replay speed option's default is to replay the recorded data at 1x, its original speed. You can increase the replay speed by selected one of the provided multiples.
Note
If the replay involves multiple input streams, it is possible that the streams will not be synchronized with each other. Thus the recorded data from different streams may arrive in the StreamBase application in different order from one replay to another.
You can use the sbrecord and sbfeedsim commands to perform the recording and playback steps, instead of using StreamBase Studio. You can see a reminder of the syntax of these commands in one of several ways:
The command-based record and playback steps are:
-
In a terminal window or StreamBase Command Prompt, start a StreamBase Server instance for your application. Before you can record tuples on the input streams, the application must be running. For example:
sbd MyApplication.sbapp
-
Use the sbrecord command to start the recording. You can use the
--nameparameter to set a non-default name for the recording. For example:sbrecord --name feedproc01aug09
The recording begins once StreamBase detects that data has been enqueued onto one of the input streams. By default, each recording is named
applicationName-timestamp.sbrec -
Enqueue data to one or more input streams. For example, you can run a StreamBase producer client that enqueues data onto streams, or you can use sbfeedsim:
sbfeedsim -f feedproc.sbfs
For each input stream in the running application, sbrecord generates a separate comma-separated value (CSV) file. By default, each CSV file is named
applicationName-timestamp-streamName.csv--nameparameter on the sbrecord command, the CSV files are namedyourName-streamName.csv -
When you have finished enqueuing data, stop the client or the sbfeedsim command that is sending data to the running application.
-
Shut down the StreamBase Server with:
sbadmin shutdown
-
You can now replay the recording on the StreamBase application, using the sbfeedsim-old command.
Note
The note above about multiple input streams applies equally to recordings made with sbrecord.
Before you can run sbfeedsim, you must restart the StreamBase Server instance.